Toyota Prado 150 (2017-2023) Android Head Unit Install Guide
Posted on30/09/2026 by
Step-by-step installation guide for fitting an Android head unit in a Toyota Land Cruiser Prado 150 (2017-2023) for both LHD and RHD models. Detailed breakdown of connecting the factory JBL amplifier, 360° camera system, CAN-bus module selection, and OEM clip transfer.
Toyota Prado 150 (2017-2023) Android Head Unit Installation Guide
Installing an Android head unit in a Toyota Land Cruiser Prado 150 (2017-2023) takes about 1.5-2 hours via a Plug-and-Play setup and fits both Left-Hand Drive (LHD) and Right-Hand Drive (RHD) versions. The main secret to a flawless installation without errors or interference is precise wiring harness selection for one of the three factory trim levels (non-amplified, JBL audio, or 360° surround view), transferring the OEM yellow clips, and properly connecting the factory active FM antenna power wire (ANT-CONT).
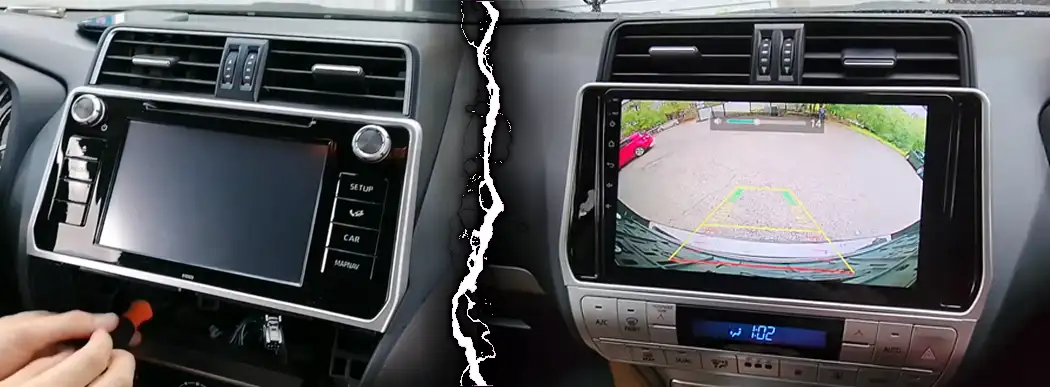
1. Trim Compatibility, CAN-Bus Modules, and Wiring Harnesses
To integrate the device correctly without modifying factory wiring, you must accurately determine your audio system specification. Toyota Prado 150 (2017-2023) features three main configurations.
| Vehicle Trim | Audio System | Cameras & Surround View | CAN-Bus Module Type | Harness Features |
|---|---|---|---|---|
| Standard / Comfort | Base audio prep (4-6 speakers, no external amplifier) | No camera or basic rearview camera | Basic CAN decoder (Raise / Hiworld) | Direct speaker connection from head unit amp, 12V-to-6V camera step-down adapter |
| Elegance / Style | Upgraded acoustics (9 speakers, no JBL logo) | Factory rearview camera with dynamic guidelines | Active CAN module with Toyota protocol support | Retains OEM USB/AUX in center console, transfers climate and parking sensor data |
| Prestige / Executive / Black Edition | Premium JBL Synthesis system (with external OEM amplifier and subwoofer) | 360° surround view system (Multi-Terrain Monitor / AVM) | Specialized CAN decoder with AVC-LAN / JBL digital bus support | RCA line-level outputs to factory amplifier, activating harness for 360° camera views |
Important Technical Tips from an Expert:
- JBL Factory Amplifier Operation: Audio signals are sent from the front RCA line outputs of the Android head unit to the OEM amplifier inputs. The CAN-Bus module controls amplifier activation and digital Fader adjustment (front/rear balance) via the AVC-LAN protocol.
- Active FM Antenna Power (GT13): The Prado 150 has a built-in factory antenna booster. When connecting the adapter from the Toyota GT13 connector, make sure to connect the blue wire (+12V ANT-CONT) to the corresponding output on the head unit. Without this, rural radio reception will be weak and unstable.
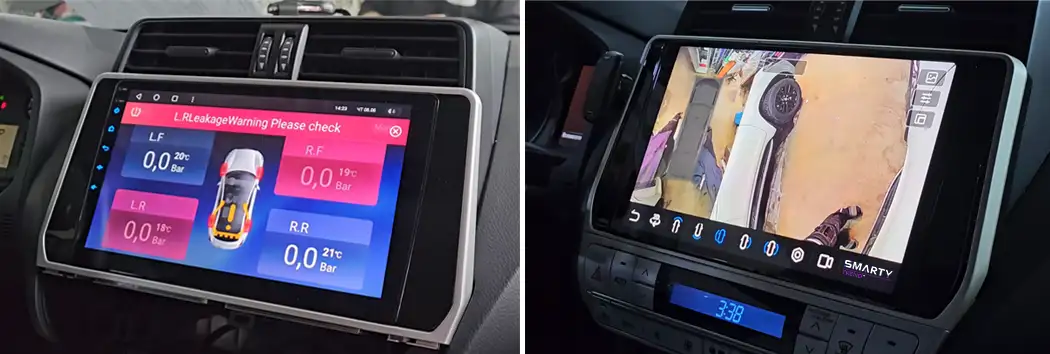
- Factory 360° Cameras: Correct operation of the AVM system requires a dedicated video input (CAM-IN) and a CAN decoder that reads pressing the physical "VIEW" button on the dashboard or steering wheel.
- 6V Factory Camera Power: Toyota OEM cameras will burn out if supplied with 12V. Only use the dedicated step-down voltage converter (Step-Down 12V-to-6V) included in the wiring kit.
2. Required Tools and Preparation
To work cleanly without damaging leather trim and plastic panels, prepare:
- Plastic trim removal tool set (prying wedges).
- 10 mm socket wrench with extension and ratchet.
- PH2 Phillips screwdriver.
- Anti-squeak fabric tape for securing and soundproofing new wiring.
3. Step-by-Step Removal and Installation Process
1. Removing Side Trim Panels
Insert a plastic wedge into the bottom part of the leather side trim panel (on the right and left of the gear selector) and gently pull outward. The panels are secured with standard metal clips. Remove both panels.
2. Removing the Lower Climate Control Panel
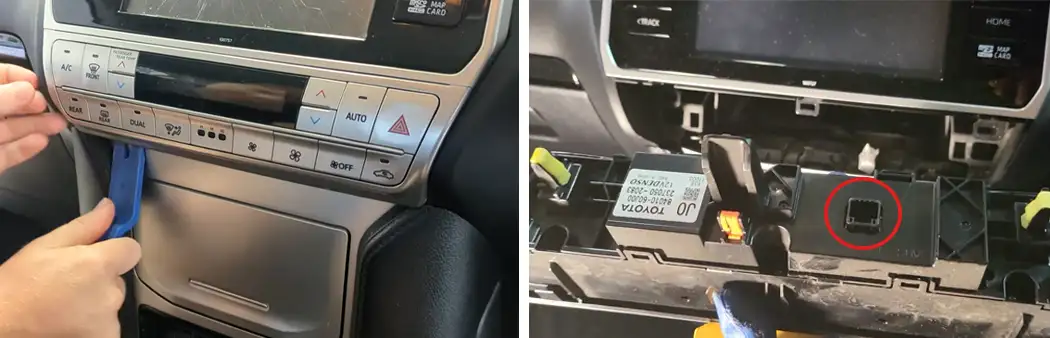
Pry up the climate control panel from the bottom. Note: the hazard warning button on the Prado 150 (2017-2023) is integrated into this panel and comes off with it. Disconnect the factory plugs and set the panel aside.
3. Removing the Factory Head Unit
Using a 10 mm socket with an extension, remove the 4 bolts securing the OEM head unit metal brackets. Pull the unit toward you, lay a soft cloth over the gear selector to prevent scratches, and unplug all rear connectors.
- 4. Preparing the New Frame Adapter
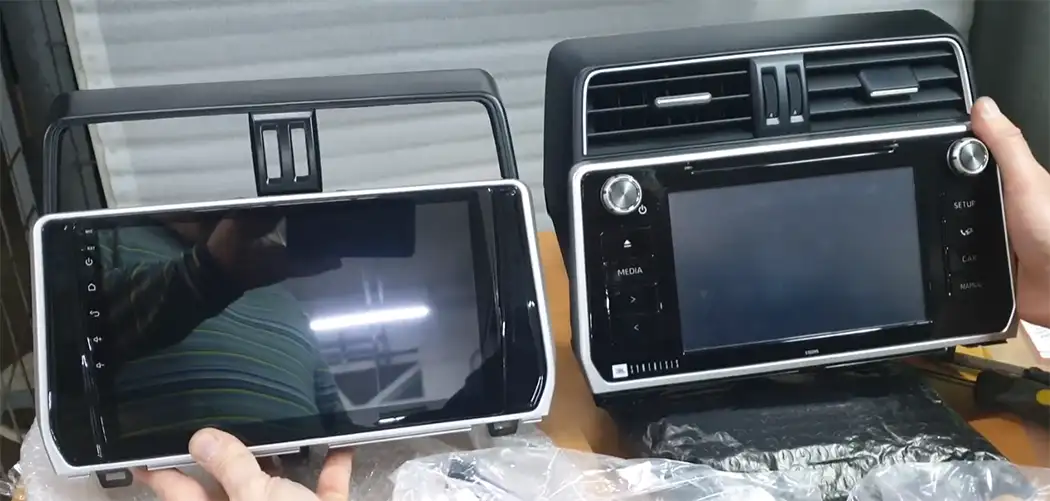
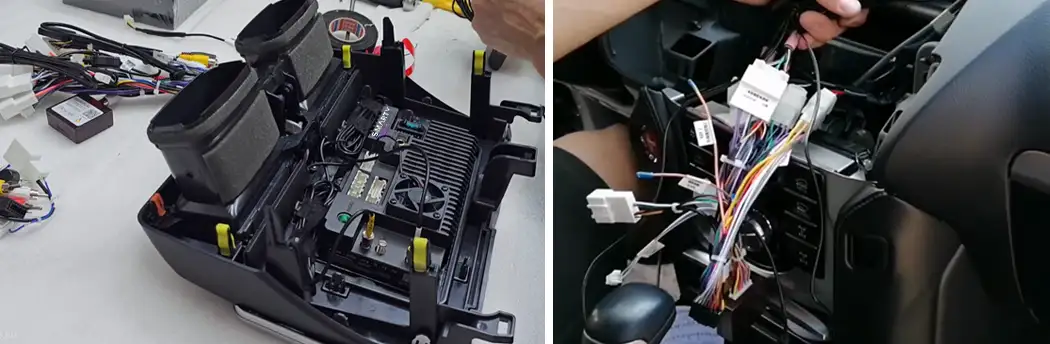
Unscrew the upper central air vent assembly from the factory unit and secure it onto the new frame. Make sure to remove all yellow and orange plastic retaining clips from the original frame and transfer them onto the new one. Without them, the frame will not lock into the dashboard.
5. Routing Peripheral Cables
Mount the GPS antenna and 4G antenna under the dashboard near the windshield pillar. Route USB cables and the SIM card slot into the glove box. Install the external microphone near the overhead console or on the steering column.
6. Wiring and CAN-Bus Adapter Connection
Connect the main wiring harness to the vehicle factory wiring. Connect the CAN-Bus decoder, GT13 radio antenna adapter with the +12V ANT-CONT wire connected, GPS, 4G, and RCA connectors to the new Android head unit.
7. Testing and CAN-Bus Configuration
Turn on the ignition. In the Android head unit factory settings, select your CAN box manufacturer (Raise, Hiworld, Simple Soft), specify vehicle model Toyota -> Land Cruiser Prado 150 -> 2017-2023 and trim level (JBL / 360 Camera).
8. Final Assembly
Verify proper operation of steering wheel controls, JBL sound, climate control, and cameras. Secure the head unit with the OEM metal brackets and 10 mm bolts, then reinstall the climate control panel and side trim pieces.
4. Software CAN-Bus Setup in Android Settings
After the first boot, the head unit requires activating the CAN decoder profile for correct data transmission over the vehicle bus:
- Connect the head unit to Wi-Fi or activate mobile data via SIM card.
- Open Settings -> Factory Settings (default password is
8888,3368, or2690). - Navigate to the CANBUS / Model Choose section.
- Select your CAN adapter manufacturer brand (indicated on the housing sticker: Raise, Hiworld, Simple Soft, or BAGOO).
- Select brand Toyota, model Prado 150, year 2017-2023, and trim option (High / JBL / 360).
- Tap Save / Apply and wait for the system to automatically reboot.
FAQ: Frequently Asked Questions
Will steering wheel control buttons work after installation?
Yes, the CAN-Bus module fully decodes digital signals from the steering wheel controls. All buttons (volume, track skipping, call answer/end, voice assistant) operate in standard mode.
Will the new head unit fit a right-hand drive (RHD) Japanese Prado 150?
Yes, the center console geometry, mounting slots, and air vents are identical for both LHD and RHD Prado 150 (2017-2023) versions. The transition frame fits perfectly without gaps.
Why is it necessary to transfer original yellow clips from the old frame?
New transition frames are supplied either without clips or with rigid plastic alternatives. Factory Toyota clips ensure a tight fit without gaps and completely eliminate rattling and squeaking while driving over bumps.
Why is the FM radio reception weak or quiet out of town after installation?
This happens if the blue power wire (+12V ANT-CONT) on the GT13 radio antenna adapter was not connected during installation. Without power, the factory Toyota antenna booster remains unpowered.
Will the factory JBL subwoofer and amplifier work?
Yes, when using the appropriate CAN module and connecting the RCA line outputs to the wiring harness, the factory JBL amplifier and subwoofer turn on automatically via digital commands from the CAN bus.
How do I switch 360° camera views on the Android screen?
When engaging reverse gear, the system automatically displays the surround view. To manually trigger cameras, use the physical VIEW button on the car dashboard or the virtual icon on the Android screen.
Комментарии
Отправить комментарий