Guide to Integrating Rearview Cameras and 360° Systems with Modern Android Head Units
SMARTY Trend
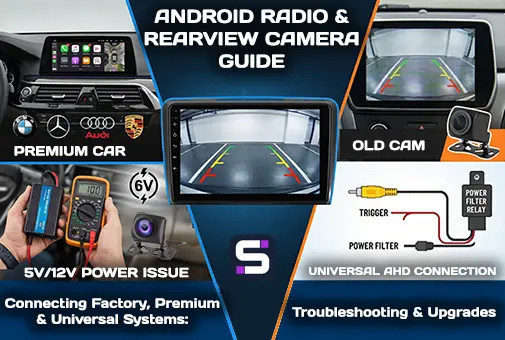
A comprehensive practical guide to properly connecting, configuring, and troubleshooting universal AHD cameras and OEM 360° systems integrated with modern Android head units.
Replacing the factory head unit with a modern Android head unit is an excellent way to upgrade your vehicle. However, during the rear-view camera connection stage, installers and vehicle owners often encounter difficulties. The issues can vary: from a black screen displaying "No Signal" to the original camera burning out due to incorrect voltage.
In this guide, we will thoroughly cover all scenarios: from the classic connection of a universal AHD camera to integration with complex factory 360° surround view systems in premium vehicles.
Part 1. Integration Features in Premium Vehicles (BMW, Mercedes, Porsche, Audi, etc.)
In modern premium vehicles, the Android head unit is often installed as an additional multimedia unit that operates in parallel with the original on-board computer. In such vehicles, you can switch between the Android interface and the original vehicle menu (e.g., BMW iDrive, Mercedes NTG, Porsche PCM).
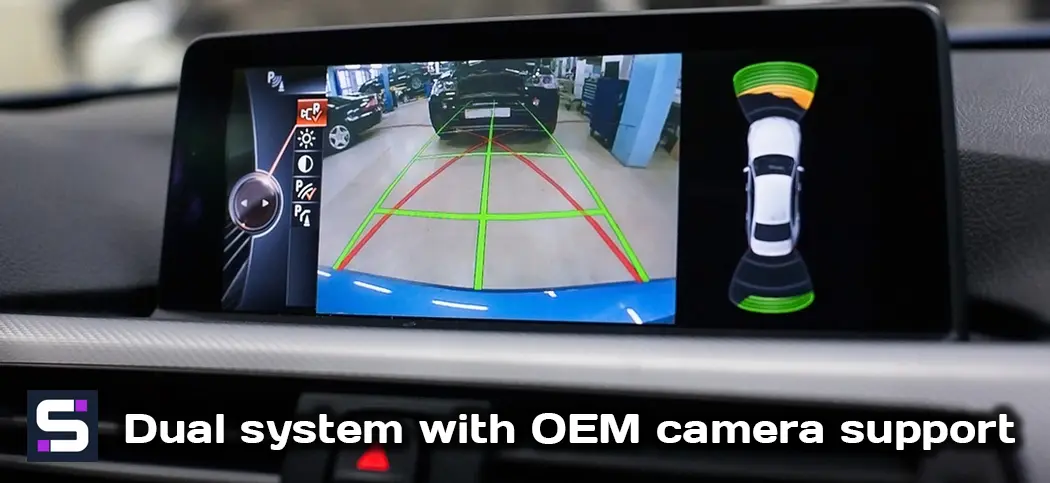
How does the factory camera or 360° system work in such vehicles?
If the device is installed "in-line" or as a screen replacement while retaining the original units, the factory camera or 360° surround view system remains fully operational.
- How it works: When reverse gear is engaged, the smart electronics of the Android device automatically read the signal from the vehicle's CAN-bus and instantly switch the screen to the factory menu mode.
- You see the same image with the same dynamic parking lines and parking sensors as before. As soon as you disengage reverse gear, the system smoothly returns you to the Android interface (navigation or music). No additional wires to the reverse light are needed in this case.
Part 2. When Is It Better to Replace the Factory Camera? (The "Soap" Effect on a Large Screen)
Many vehicle owners try at all costs to keep their original factory camera, but this often leads to disappointment. Here is why:
Resolution mismatch problem: Old factory cameras (especially on vehicles from before 2018–2020) were designed for small screens with low resolution (e.g., $400 \times 240$ or $800 \times 480$ pixels). The image looked acceptable on the old display.
When you install a modern Android head unit with a large screen (9, 10, or 12.3 inches) and high resolution (HD, Full HD, QLED, or 2K), the signal from the old analog camera is stretched. The result is heavy grain, blur ("soap"), and dull colours. At night, such a camera shows practically nothing.
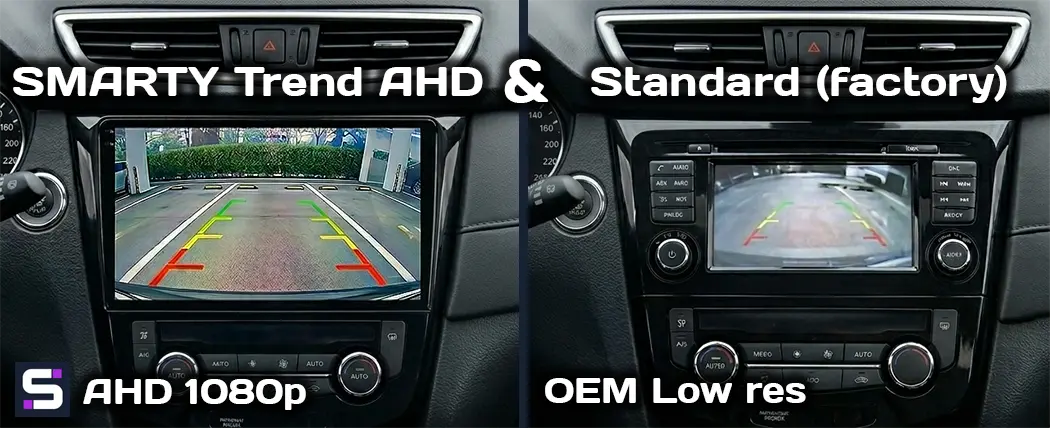
Expert recommendation: If your factory screen was small, we strongly recommend replacing the old factory camera with a modern digital high-resolution AHD camera from our range. It features a wide field of view (up to 170–180°), excellent night-time light sensitivity, and delivers a detailed image that fully unlocks the potential of the new 2K or QLED screen.
Part 3. Connecting the Factory Camera in Regular Vehicles (with Voltage Conversion)
If the vehicle does not belong to the premium segment with complex multimedia systems but has a factory camera, the main mistake when connecting it directly to Android is the assumption that all automotive components run on 12 Volts.
1. Power Problem: Why Will 12V Burn Out the Factory Camera?
Most vehicle manufacturers (Toyota, Lexus, Hyundai, Kia, Volkswagen, MITSUBISHI, etc.) use factory cameras rated for 5V or 6V. Power was supplied directly from the old original head unit.
If you take the original camera's power cable and connect it to 12V (for example, from the reverse light or the new head unit's output), the camera will burn out within seconds.
Solution: Use a step-down voltage converter from 12V to 6V (or 5V, depending on the brand).
2. Finding the Video Signal and Pin-out
You need to locate two wires in the original vehicle connector:
Video + (V-OUT): The central conductor of the video signal.
Video − (GND Video): The shield/ground of the video signal.
To connect to the Android head unit, these two wires must be joined to a standard RCA connector: Video + is soldered to the centre pin of the RCA plug, and Video − to its outer metal collar. To avoid cutting the wiring by hand, use ready-made adapters (e.g., factory camera adapters for Toyota with 16-pin or 24-pin connectors), where the 6V converter is already built in.
Part 4. Connecting a Universal Rear-View Camera (from Scratch)
If the vehicle had no camera, or you have decided to follow our recommendation and replace the old "soapy" factory camera with a new AHD 1080p unit, the connection is made using the standard scheme with a 6-metre coaxial RCA cable that has an additional short red wire (trigger) at both ends.
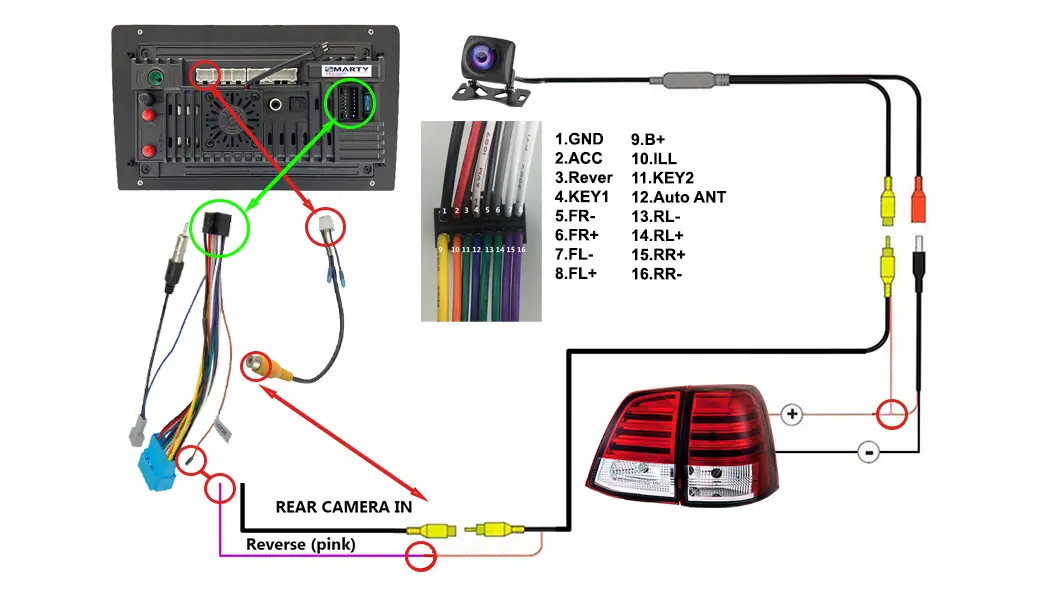
Step-by-Step Wiring Diagram
Step 1. Connection on the Camera Side (at the rear of the vehicle)
Camera power (+12V): The red wire from the short camera power cable is connected to the positive wire of the reverse light (current flows only when reverse gear is engaged).
Ground (GND): The black wire of the camera power cable is connected to the vehicle's metal body ("chassis ground") or to the negative wire of the reverse light.
Trigger connection: The thin red wire coming out of the long RCA video cable is twisted together with the camera's positive power wire and connected to the same positive wire of the reverse light.
Step 2. Connection on the Android Head Unit Side
Video signal: The yellow RCA connector is inserted into the specific input on the rear panel of the head unit, labelled CAMERA IN, CAM-VIN, or BACK VIDEO IN. Do not confuse it with AUX IN, otherwise no image will appear.
Screen activation (Trigger): The other end of the thin red wire coming out of the RCA cable near the head unit is connected to the wire in the main head unit connector. This wire is typically pink or brown and labelled BACK or REVERSE.
Part 5. Troubleshooting (FAQ)
1. Black Screen or "No Signal" Message
Video format not selected: Go to Head unit Settings → Factory Settings (code 3368) → Camera Parameters and select the format matching your camera (e.g., AHD/25fps or CVBS/NTSC). If the formats do not match, no image will appear.
No power: Use a test meter to check whether +12V reaches the camera when reverse gear is engaged.
2. Interference, Ripple, and Stripes with the Engine Running (especially in VW, Skoda, Audi, BMW)
Cause: In European vehicles, lighting power management uses PWM (pulsed current to monitor bulb failure). With the engine off the image is perfect, but once the engine is running, severe interference appears.
Solution: Connect the camera through a power filter (rectifier) or an automotive delay relay. The pulsed positive from the reverse light is used only as a signal, while "clean" +12V is taken from the cigarette lighter socket or ACC circuit.
Комментарии
Отправить комментарий